Get 5% Off – Use promo code German Attire


How to Lace a Dirndl? Step-by-Step Guide for Perfect Fit
How to Lace a Dirndl: Complete Guide to Perfect Bodice Lacing
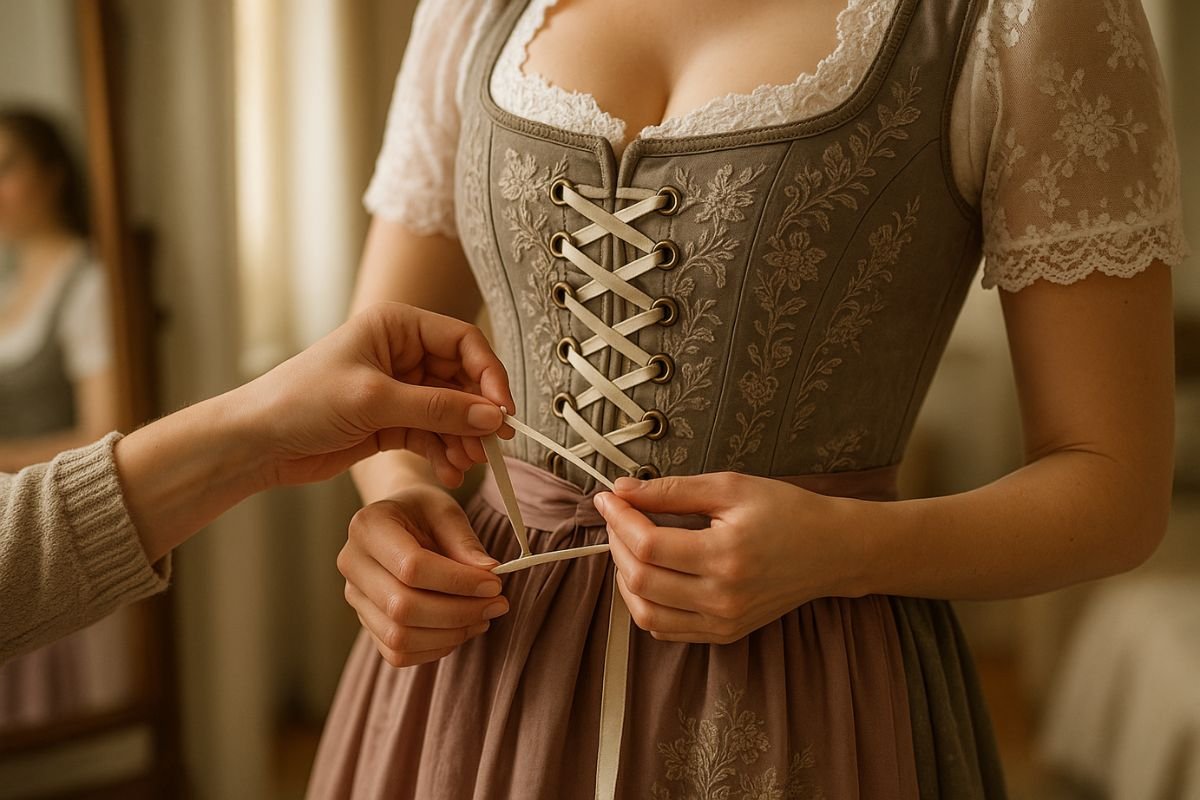
You’re standing in front of your mirror, dirndl bodice hanging open, ribbon clutched in both hands. The lacing holes march up the front in two neat rows, but which one do you start with? Do you cross the ribbon over or under? Why does one side pull tighter than the other no matter how carefully you thread? You yank everything out and start fresh. Again. This marks your third attempt and your friends expect you in twenty minutes. The YouTube video you watched made it look effortless—yet here you are, tangled in satin ribbon, wondering if dirndl lacing requires some secret knowledge passed down through Bavarian generations.
Dirndl lacing isn’t just decorative—it’s functional engineering that adjusts bodice fit, creates the traditional silhouette, and allows one garment to accommodate slight size variations through tension adjustment. However, the technique requires understanding proper threading patterns, appropriate materials, correct tension levels, and troubleshooting strategies when things go wrong. This comprehensive guide covers every aspect of dirndl lacing from selecting appropriate ribbon or chain, to mastering the classic crisscross pattern, to adjusting tension for comfortable all-day wear, to fixing common problems like twisted lacing or uneven sides, ensuring you can lace your dirndl confidently whether dressing for Oktoberfest, weddings, or cultural celebrations.
Understanding Dirndl Lacing Purpose and Construction
Before learning technique, understanding why dirndls have lacing and how the bodice construction works helps you lace more effectively.
The Functional Purpose of Bodice Lacing
Dirndl lacing serves multiple practical purposes beyond aesthetics. Primarily, it allows fit adjustment—tightening or loosening the bodice to accommodate slight size variations, different undergarment choices, or body changes throughout the day (breathing deeply, sitting, eating). The lacing creates the characteristic dirndl silhouette by cinching the bodice to emphasize waist definition and provide structured support. Additionally, lacing offers customization—adjusting upper bodice tension differently from lower sections to account for individual body proportions.
Unlike modern clothing with fixed sizing, traditional dirndls with lacing accommodate 2-4cm of size variation in bust and waist measurements, making them more forgiving and longer-lasting as bodies change. This adaptability partly explains why quality dirndls remain wearable for decades—the lacing adjusts to fit rather than requiring alterations.
Different Bodice Closure Types
Not all dirndls feature lacing. Understanding your bodice type determines whether you need lacing technique or different closure methods.
Lacing-Only Bodices: Traditional construction where lacing provides the sole closure mechanism, running from bottom to top of the bodice front. These require proper lacing technique for the dress to stay on and fit correctly.
Lacing with Hook-and-Eye: Hybrid construction featuring both lacing (decorative and for fine-tuning) and concealed hook-and-eye closures (primary fastening). These close securely with hooks, with lacing adjusting final fit and appearance.
Decorative Lacing Only: Some modern dirndls feature decorative lacing that’s purely ornamental, with the bodice actually closing via hidden side zippers or back zippers. This “lacing” might be pre-laced and non-functional.
Identify your bodice type before attempting lacing—if your dirndl has concealed closures, fasten those first, then adjust decorative lacing for appearance rather than structural support.
Choosing Your Lacing Material
The ribbon, chain, or cord you use affects both appearance and functionality—selection matters more than most people realize.
Material Options and Their Properties
| Material Type | Appearance | Durability | Best For | Approximate Cost | Pros | Cons |
| Satin Ribbon | Smooth, shiny, formal | Moderate (frays with wear) | Weddings, formal events | €3-€8 per meter | Elegant, available in many colors | Slippery, twists easily, frays |
| Grosgrain Ribbon | Ribbed texture, matte | Good | All occasions, everyday wear | €4-€10 per meter | Grips well, minimal twisting, durable | Less formal appearance |
| Velvet Ribbon | Plush, luxurious | Good | Autumn/winter, formal events | €6-€15 per meter | Rich appearance, grips excellently | Bulky, expensive, seasonal |
| Cotton Cord | Simple, matte, rustic | Excellent | Casual festivals, traditional style | €2-€6 per meter | Very durable, authentic, affordable | Less formal, limited colors |
| Leather Cord | Natural, textured | Excellent | Rustic, folk-style dirndls | €8-€20 per meter | Extremely durable, unique look | Expensive, less flexible |
| Metal Chain | Shiny, structured | Excellent | Modern, edgy, Oktoberfest | €10-€30 per set | Durable, striking, contemporary | Heavy, can scratch bodice |
Selection Guidance: For first-time lacers, grosgrain ribbon offers the best balance—it doesn’t twist as easily as satin, grips well without slipping, and works for most occasions. Reserve satin for formal events where you’ll take extra care, and consider metal chains only after mastering ribbon lacing since chains require different technique.
Determining Required Length
Lacing length depends on bodice height and eyelet spacing. Measure from the bottom eyelet to the top eyelet, multiply by 3.5, then add 60-80cm for bow tying. For example: bodice with 40cm of eyelets requires (40 × 3.5) + 70 = 210cm of lacing minimum. Purchase 2.5-3 meters to ensure adequate length for comfortable bows and potential mistakes during lacing.
Pre-made dirndl lacing sets typically come in standard lengths (2m, 2.5m, 3m). When buying ribbon by the meter, purchase more than calculated—extra length costs little but running short mid-lacing proves frustrating.
Color Coordination Considerations
Traditional color choices include matching the ribbon to the dirndl’s primary color (creates cohesive, elegant appearance), contrasting with the dirndl color (adds visual interest—burgundy ribbon on black dirndl, cream ribbon on forest green), or matching trim or embroidery details (ties outfit elements together). White or cream ribbon works universally with any dirndl, offering safe, classic styling. For those assembling complete outfits, coordinate lacing colors with other accessories—see our guide on what to wear with a dirndl for complete accessory coordination strategies.
The Classic Crisscross Lacing Technique
The traditional dirndl lacing pattern creates secure, adjustable fit while maintaining the iconic corset-inspired appearance.
Step-by-Step Lacing Instructions
Step 1: Starting at the Bottom
Begin with the bottom pair of eyelets. Thread your lacing from behind (inside the bodice) through both bottom eyelets, pulling through until both ends emerge with equal length. This inside-to-outside threading creates the cleanest appearance with minimal bulk inside the bodice. Verify both ends match in length—unequal starting lengths create lopsided final results requiring complete re-lacing.
Step 2: The First Cross
Take the right lacing end and cross it diagonally upward to the left, threading it through the second eyelet on the left side from front to back (outside to inside). Pull snug but not tight. Take the left lacing end and cross it diagonally upward to the right, threading through the second eyelet on the right side from front to back. You’ve now created your first X pattern.
Step 3: Continuing the Crisscross Pattern
Continue this pattern: right side crosses to left, threading from outside to inside; left side crosses to right, threading from outside to inside. The lacing creates an alternating over-under X pattern climbing up the bodice front. Each cross should sit flat, not twisted, with even spacing between crosses.
Step 4: Maintaining Even Tension
As you lace upward, pull each cross moderately snug—tight enough the bodice begins conforming to your body but not so tight you can’t breathe. The goal is progressive, even tension from bottom to top. Many people err by pulling the bottom crosses extremely tight then loosening as they go up, but this creates uncomfortable pressure at the waist while leaving the bust unsupported. Aim for consistent tension throughout.
Step 5: Finishing at the Top
Upon reaching the final eyelets, thread both lacing ends through from behind (inside to outside) just like you started at the bottom. Both ends should emerge outside the bodice, ready for bow tying or decorative finishing.
Alternative Lacing Patterns
While crisscross dominates, alternative patterns offer different aesthetics and fit characteristics.
Straight Lacing (Ladder Pattern):
Instead of diagonal crosses, the lacing runs straight across from left eyelet to right eyelet, then threads upward on the inside before emerging for the next straight cross. This creates parallel horizontal lines with vertical sections hidden behind the bodice edges. Ladder lacing looks extremely clean and modern but provides less adjustable tension than crisscross—best for bodices that already fit well without needing much adjustment.
Double Crisscross:
An elaborate pattern where two separate lacing cords crisscross simultaneously, creating a denser, more decorated appearance. This primarily serves decorative purposes at formal events or competitions, requiring significant extra time and offering minimal practical advantage over standard crisscross.
When Patterns Matter:
For daily wear and most events, standard crisscross proves sufficient. Explore alternative patterns only after mastering the basics or for special occasions where elaborate presentation justifies the extra effort.
Achieving the Right Tension and Fit
Proper lacing tension makes the difference between comfortable, flattering wear and miserable compression or sloppy fit.
Signs of Correct Tension
Well-laced dirndl bodice indicators include:
- Bodice conforms smoothly to your torso without gaping or pulling
- You can breathe deeply and comfortably without feeling squeezed
- Two finger can slide between the bodice and your body at the sides
- No bulging flesh above or below the bodice edges
- Lacing lies flat without puckering the fabric between eyelets
- You can sit, stand, and move arms freely without the bodice shifting position
If all these conditions exist, your tension is likely correct. However, comfort varies individually—some prefer looser fit prioritizing ease of movement, others prefer snugger construction for maximum silhouette definition.
Tension Adjustment Guide
| Issue | Visual Sign | Physical Feeling | Solution |
| Too Loose | Bodice gapes away from body, especially at neckline | No support, bodice shifts during movement | Unlace completely, re-lace with firmer pulls on each cross |
| Too Tight Overall | Fabric straining between eyelets, visible stress lines | Can’t breathe deeply, uncomfortable pressure | Loosen entire lacing by pulling each cross slightly looser |
| Too Tight at Bust | Flesh bulging above bodice top, red marks | Compressed chest, restricted breathing | Loosen only the top 3-4 crosses while maintaining lower tension |
| Too Tight at Waist | Extreme cinching at bottom, possible rolling | Pain at waist, can’t sit comfortably | Loosen bottom 3-4 crosses, slight tightening at top for balance |
| Uneven Sides | One side pulled tighter, asymmetrical appearance | One side feels tighter than the other | Start over, ensuring equal lacing length from beginning |
Adjusting Tension During Wearing
Dirndl tension needs may change during events. After eating, you might need slight loosening at the waist. After extended standing or dancing, adjusting the bust area for comfort makes sense. To adjust without complete re-lacing: loosen the bow, pull small amounts of slack through each cross from bottom to top (or top to bottom) until reaching the area needing adjustment, then redistribute tension and re-tie the bow.
For significant changes, complete re-lacing works better than trying to shift large amounts of slack through many crosses—the attempt usually creates uneven results requiring re-lacing anyway.
Tying and Finishing the Lacing
How you finish the lacing affects both security and appearance—several options suit different preferences and occasions.
The Classic Bow
Pull both lacing ends upward after emerging from the top eyelets, adjust for equal length, and tie a standard bow like shoelaces. Position the bow slightly off-center (left or right) for more interesting styling than dead-center placement. Make the loops proportional to your bodice size—large, floppy bows on petite bodices look overwhelming; tiny, tight bows on long bodices appear skimpy. Aim for loops 8-12cm wide as general guidance.
Secure the bow properly: tie a standard square knot first (right over left, left over right), then form loops. This base knot prevents the bow from loosening during wear. Satin ribbon particularly tends to slip without secure base knots.
Alternative Finishing Styles
Tucked Ends: Thread both lacing ends back into the top eyelets after emerging, pushing them to the inside of the bodice. This creates a clean, minimalist appearance without visible lacing ends. Secure the inside ends by tying them together or pinning to the bodice lining to prevent them working loose.
Decorative Dangling: Let the lacing ends dangle freely below the bottom of the bodice after tying them together with a simple knot. This casual, relaxed styling suits informal festivals. Dangling ends can be quite long (20-30cm) for dramatic effect or shorter for subtlety.
Charm Addition: Attach decorative charms, pendants, or brooches to the center of the lacing—popular choices include Edelweiss flowers, heart charms, or traditional Bavarian symbols. These personal touches make your dirndl distinctive.
Troubleshooting Common Lacing Problems
Even experienced lacers encounter problems—knowing quick fixes prevents frustration.
Twisted or Curled Ribbon
Problem: Satin ribbon especially tends to twist as you lace, creating messy appearance with the shiny side sometimes showing, sometimes not.
Prevention: As you thread each cross, deliberately smooth the ribbon flat before pulling it through, ensuring the desired side faces outward. Grosgrain ribbon resists twisting better than satin—consider switching if twisting drives you crazy.
Fix: If you notice twisting after several crosses, don’t continue hoping it improves—it won’t. Stop, smooth that section flat, adjust the crosses as needed, then continue. For already-laced but twisted sections, gently work the twist out by running your fingers along the ribbon while slightly loosening tension, rotating the ribbon to lay flat, then re-tightening.
Uneven Sides Creating Lopsided Appearance
Problem: One side of the bodice pulls tighter than the other, creating asymmetrical fit and appearance.
Cause: Unequal starting lengths, uneven tension during lacing, or accidental skipping of eyelets on one side.
Fix: Check that you haven’t accidentally skipped eyelets—count them on both sides. If the eyelet count matches but tension doesn’t, the simplest fix is complete re-lacing. Attempting to even out tension by loosening one side usually creates new problems. Start fresh, verify equal starting lengths, and consciously pull each cross with similar force.
Lacing Too Short or Too Long
Problem: You reach the top eyelets but don’t have enough lacing left for a decent bow, or conversely, you have excessive lacing creating huge, ungainly bows.
Solution for Too Short: If you’re close (within 10-15cm of adequate bow), try smaller loops. If you’re significantly short, you need longer lacing—unlace completely and replace with proper length. This situation often occurs when people cut damaged ribbon without measuring replacement length.
Solution for Too Long: Embrace it. Extra length harms nothing—tie larger bows, create multiple loops, or let ends dangle decoratively. Excessive lacing never causes problems beyond aesthetics; insufficient lacing makes proper finishing impossible.
Lacing Breaking or Fraying Mid-Event
Problem: Your lacing breaks during wear—usually from old, weakened ribbon finally giving way under tension.
Emergency Fix: If at an event when lacing breaks, temporarily knot the broken ends together. This won’t look great but holds the bodice closed until proper repair. Alternatively, safety pins can hold the bodice closed in emergency situations until you can replace the lacing.
Prevention: Inspect lacing before events. If it shows fraying, fading, or weak spots, replace it before wearing. Quality lacing should last 20-30 wearings with proper care; cheap ribbon might fail after 5-10 uses.
Lacing Yourself Versus With Assistance
Solo lacing versus having someone help affects technique and ease—both work but require different approaches.
Lacing Yourself: One-Person Technique
Lacing your own dirndl takes practice but becomes straightforward with experience. Put the dirndl on with the bodice hanging open. Stand in front of a mirror so you can see what you’re doing. Begin lacing from the bottom, pulling the bodice closed as you work upward. The bottom crosses require reaching down and back, sometimes awkwardly, but become easier as you work toward the more accessible upper section.
Key tip for solo lacing: don’t pull maximum tension on every cross as you go—this makes the bodice too tight to work with as you continue upward. Instead, pull moderately snug, completing the entire lacing, then go back and adjust tension from bottom to top for even, comfortable fit.
Expected time: First attempt might take 15-20 minutes. After several wearings, solo lacing takes 5-8 minutes.
Having Someone Lace You: Two-Person Technique
Having another person lace your dirndl proves faster and achieves better results, especially for achieving even tension. Wear the dirndl with bodice open. Stand still and straight while the other person laces from behind or in front (front is usually easier for the lacer to see what they’re doing).
Communicate during the process: tell them if areas feel too tight, too loose, or uncomfortable. They can’t feel what you feel, so verbal feedback ensures proper fit. Once laced, check the mirror together and make final adjustments.
Expected time: With an experienced lacer, 3-5 minutes. Two inexperienced people might take 8-12 minutes.
Maintaining and Caring for Dirndl Lacing
Proper lacing care extends its lifespan and keeps your dirndl looking polished.
Cleaning Lacing
Remove lacing before washing your dirndl when possible—this prevents tangling, allows thorough cleaning of both bodice and lacing, and protects delicate materials. Hand-wash ribbon lacing in cool water with gentle soap, rinse thoroughly, and lay flat to dry. Never machine dry ribbon—heat destroys the material’s structure and can cause shrinkage or warping.
Metal chains can be wiped clean with damp cloth or gently washed in warm soapy water, then dried completely before storage to prevent tarnish or rust.
Storage Between Wearings
After removing lacing from your dirndl, loosely coil it rather than wadding it into a ball—this prevents permanent creases and kinks. Store in a small bag or box separately from the dirndl to avoid tangling. Some people loop lacing around small pieces of cardboard maintaining its shape and preventing snarls.
Avoid storing lacing still threaded through the dirndl bodice between wearings—the constant tension can stretch ribbons and degrade them faster. Unlace completely, store separately, and re-lace before each wearing for longest lacing life.
When to Replace Lacing
Replace lacing when you notice: significant fraying at the ends or along the length, loss of color vibrancy (fading), stretching causing it to no longer hold tension properly, or physical damage (tears, weak spots, broken fibers). Quality ribbon lacing typically lasts 1-2 years of regular use (wearing 4-6 times annually); more frequent wear necessitates more frequent replacement.
Replacing lacing costs €5-€15 typically—inexpensive maintenance preserving your dirndl’s appearance. Don’t hesitate to replace tired-looking lacing; it dramatically improves overall presentation.
Understanding Your Dirndl’s Specific Construction
Different dirndl manufacturers use varying bodice constructions affecting how you should lace.
Eyelet Styles and Materials
Metal Eyelets (Grommets): The most common and durable construction. Metal grommets provide smooth, reinforced holes preventing fabric tearing and accommodating repeated lacing and unlacing. These work with any lacing material.
Stitched Loops: Some dirndls use fabric loops stitched to the bodice edges instead of eyelets. These work best with thinner lacing materials (ribbon, cord) rather than chains, and must be treated gently to avoid tearing the stitching.
Hook or Ring Attachments: Decorative hooks or rings sewn to the bodice provide lacing points. These often combine functionality with ornamental appeal and work well with chains or thicker cords.
Working With Different Constructions
Each construction type requires slight technique modifications. Metal eyelets tolerate firm pulling and any material type. Stitched loops require gentler handling—avoid yanking the lacing hard enough to stress the stitching. Hooks or rings sometimes require threading the lacing through first, then making the cross, rather than threading through while crossing.
Examine your specific dirndl’s construction before lacing to understand what you’re working with—this prevents accidental damage to delicate attachments.
For those selecting dirndls and wanting to understand construction quality including lacing systems, see our guide on how to buy a dirndl covering quality assessment and construction evaluation.
Practice and Skill Development
Like any physical skill, dirndl lacing improves with practice—don’t expect perfection initially.
First-Timer Tips
Your first lacing attempt will be slower, messier, and more frustrating than subsequent attempts. Accept this. Budget extra time (30-45 minutes) for your first few attempts. Don’t try to master perfect lacing the morning of your event—practice beforehand when you’re not rushed.
Common first-timer mistakes include: pulling too tight too quickly, creating uncomfortable compression; making uneven crosses (some tight, some loose); losing track of the pattern midway; and running out of lacing because you used excessive length on early crosses. All these resolve with practice.
Developing Muscle Memory
After 3-4 complete lacing sessions, your hands start remembering the pattern without conscious thought. By your 8th or 10th lacing, the process becomes almost automatic—your hands know the rhythm of cross, pull, thread, cross, pull, thread without your brain micromanaging each movement.
To accelerate learning, practice lacing and unlacing several times in succession during a practice session. The repetition builds muscle memory faster than spacing practice sessions days apart.
Frequently Asked Questions About Dirndl Lacing
How long does it take to lace a dirndl?
First time lacing your own dirndl? Budget 15-20 minutes until you figure out the pattern and tension. By your third or fourth attempt, you’ll be down to 8-10 minutes. Experienced wearers who’ve laced the same dirndl dozens of times can finish in 4-5 minutes flat. With someone helping you, cut those times in half—a friend who knows what they’re doing can lace you in 3-5 minutes. The wild card is how fussy you are about perfection. Accepting “good enough” gets you finished quickly; obsessing over perfectly even tension adds time.
What happens if I lace it too tight?
You’ll know immediately—dirndl bodices laced too tight create uncomfortable pressure around your ribs, make breathing difficult, and can cause the fabric to strain and pucker between eyelets. Some women even experience numbness or tingling from restricted circulation. The worst part? If you tough it out thinking you’ll adjust, you’re setting yourself up for a miserable event. Your body doesn’t “get used to it”—it just gets more uncomfortable as hours pass. The solution is unlacing and starting over with lighter tension. Yes, it’s annoying. But it’s better than spending six hours at Oktoberfest unable to breathe properly or sit comfortably.
Can you replace dirndl lacing yourself?
Absolutely, and it’s one of the easiest dirndl maintenance tasks. Simply unlace the old ribbon completely, measure its length, and purchase replacement ribbon 10-20cm longer than the original (just in case). Thread the new lacing following the same pattern as the old one. The entire process takes 10-15 minutes maximum. Most people replace their lacing every year or two depending on wear frequency—it’s normal maintenance, not a sign something’s wrong. Fresh lacing dramatically improves your dirndl’s appearance, and it costs only €5-€15. Don’t keep using frayed, faded lacing out of inertia when replacement is this simple.
How do you keep ribbon from twisting while lacing?
Twisting ribbons—especially satin—drive people crazy. The trick is active management: as you thread each cross, deliberately run your fingers along the ribbon ensuring it lies flat with the desired side showing. Smooth it before pulling it through the eyelet, and verify it’s still flat after pulling. This takes an extra second per cross, but prevents the maddening “half the ribbon is backwards” situation. If you’re using satin and finding it impossible, switch to grosgrain ribbon. Grosgrain’s ribbed texture naturally resists twisting—it’s structurally more stable. Yes, grosgrain looks slightly less formal, but the sanity you preserve is worth it.
Do all dirndls have lacing?
No. Traditional dirndls almost always feature lacing, but modern dirndls sometimes use hidden zippers (side or back) with purely decorative non-functional lacing, or eliminate lacing entirely in favor of buttons or hooks. If you bought your dirndl and aren’t sure whether the lacing is functional, try this test: unlace it completely—if the bodice hangs open with no other way to close it, the lacing is functional. If the bodice stays closed via hidden fasteners and only the decorative lacing is undone, it’s non-functional. This matters because attempting to adjust fit via non-functional lacing accomplishes nothing—those are just for show.
What’s the best ribbon for beginners?
Grosgrain ribbon wins for beginner-friendly lacing. It’s textured rather than slippery, resists twisting better than satin, holds tension reliably, and forgives small mistakes. Plus it’s affordable (€4-€8 per meter) so replacing it when you inevitably make mistakes doesn’t break the bank. Once you’ve mastered the basic technique with grosgrain, then experiment with satin for formal events or chains for modern looks. But for learning? Stick with grosgrain in a color that complements your dirndl. You’ll thank yourself when you’re not fighting slippery ribbon and starting over repeatedly.
How tight should dirndl lacing actually be?
The “slide two fingers under the bodice at the sides” test works well. If you can comfortably slide two fingers between the bodice and your body at the sides, that’s about right. You should feel supported and shaped but not compressed or restricted. Can you breathe deeply? Sit down comfortably? Raise your arms without the bodice shifting? Then you’re probably good. Remember that different people prefer different fits—some like very snug for maximum silhouette definition; others prefer looser for comfort during active events. There’s no universal “correct” tightness, just whatever balance of shaping and comfort works for your body and occasion.
Can you lace a dirndl by yourself or do you need help?
You can definitely lace yourself—millions of women do it daily. It’s more awkward than having help, especially reaching the bottom eyelets behind your back, but entirely manageable with practice. Stand in front of a mirror so you can see what you’re doing. Start from the bottom and work up. The first few times feel clumsy, but by your third or fourth attempt, you’ll have the hang of it. That said, if someone’s available to help, take them up on it—they can achieve more even tension and finish in half the time. But don’t let lack of help stop you from wearing your dirndl. Solo lacing is a learnable skill.
What do you do if lacing breaks at an event?
First, don’t panic. If you have safety pins, use them to hold the bodice closed temporarily—pin from the inside at several points along the opening. This looks less elegant but keeps your dress on. If someone has a spare hair elastic or rubber band, you can loop it through eyelets as an emergency closure. Some women keep a small sewing kit in their bags including extra ribbon for exactly this scenario. If the break is near the end of your lacing, you might be able to re-tie the broken pieces together, losing some length but maintaining enough to finish the bow. Worst case scenario—if the bodice won’t stay closed—excuse yourself and head home to replace the lacing. It’s rare for lacing to break suddenly unless it was already very worn, so regular inspection and replacement prevents this problem.
How do you unlace a dirndl at the end of the day?
Unlacing is the reverse of lacing but faster. Untie the bow first. Starting from either top or bottom (personal preference), gently pull the lacing through each eyelet, working your way to the other end. The bodice naturally opens as you unlace. Don’t yank hard—damaged eyelets from aggressive unlacing cause problems later. Remove the lacing completely and store it separately from the dirndl rather than leaving it threaded through. This prevents the lacing from stretching during storage and makes checking the bodice for needed cleaning or repairs easier. The whole process takes 2-3 minutes even when you’re tired after a long event.
For those assembling complete traditional wardrobes beyond lacing technique, explore authentic Bavarian traditional dirndl dress collections and ladies Oktoberfest dress options offering quality construction with proper lacing systems supporting both function and beauty.

Anna Bauer is a seasoned Bavarian fashion expert, cultural consultant, and heritage stylist with over a decade of hands-on experience in traditional German clothing. Born in Munich, the heart of Bavaria, Anna grew up surrounded by the rich traditions of Trachten fashion. Her passion for cultural attire led her to pursue a degree in Fashion and Textile Design at the prestigious University of the Arts Berlin, where she specialized in European folkwear.
Over the past 12+ years, Anna has collaborated with renowned Trachten designers, styled outfits for Oktoberfest events across Germany, and contributed articles to top fashion and culture magazines across Europe. Her work focuses on preserving the authenticity of Lederhosen and Dirndl wear while helping modern audiences style them with confidence and flair.
As the lead content contributor for German Attire, Anna combines her academic background, professional styling experience, and deep cultural roots to provide readers with valuable insights into traditional German fashion. Her blog posts cover everything from historical origins and styling guides to care tips and festival outfit planning—making her a trusted voice for anyone looking to embrace Bavarian heritage in a stylish, modern way.