Get 5% Off – Use promo code German Attire


How to Make Lederhosen? A Complete Step-by-Step Guide
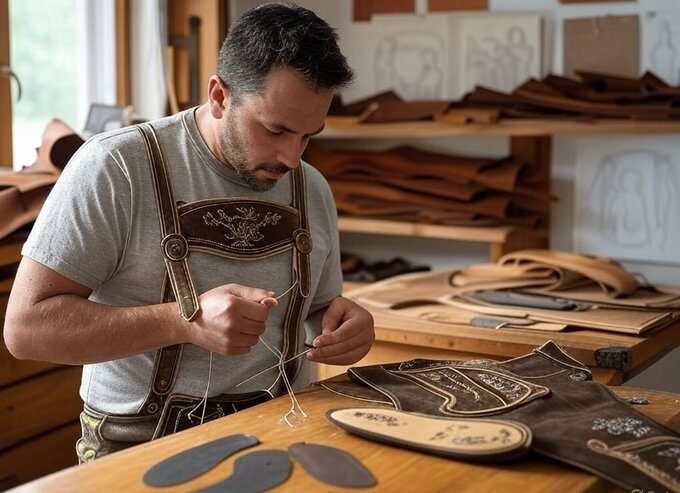
How to Make Lederhosen at Home: A DIY Guide for Leatherworkers
You’ve decided to make your own Lederhosen. This isn’t a casual weekend project—it’s a serious leatherworking commitment. But if you have the right skills, materials, and patience, you can create an authentic pair that rivals professionally-made garments.
This guide covers the making process from start to finish. For information on fit and sizing after you’ve made your pair, see The Complete Guide to Perfect Lederhosen Fit.
The question isn’t whether you can make Lederhosen—you can. The question is whether you should. Let’s find out.
Is Making Lederhosen Right for You? A Realistic Assessment
Before diving into patterns and leather, be honest about what this project requires. Most DIY guides say “intermediate to advanced” and leave it at that. But you need specifics.
Skill Level Requirements
You need intermediate leatherworking or advanced sewing skills. Not beginner sewing—leatherworking. This distinction matters. If you’ve made cotton dresses or linen shirts, that experience is valuable, but leather behaves differently. Cotton forgives mistakes. Leather doesn’t.
You need understanding of pattern matching and cutting precision. You need experience with thick, rigid materials, not stretchy fabrics. You need the ability to operate a heavy-duty sewing machine or comfort with hand-stitching techniques. Hardware installation—rivets, buckles, buttons—requires specific knowledge. Seam finishing and edge treatment separate amateur projects from professional ones.
The ideal background includes previous leather projects like boots, belts, or bags. Alternatively, advanced sewing with experience adjusting patterns for different body types works. Formal training in leatherworking or tailoring is even better. If you’re a beginner sewer, don’t start with Lederhosen. The leather cost alone makes mistakes expensive. Start with a leather belt or simple pouch first.
Time Commitment
First-time makers should expect 30-50 hours total over 4-6 weeks. The work isn’t continuous—leather needs rest between sessions. Experienced leatherworkers can complete the project in 15-25 hours. Experienced tailors with no leather background typically need 25-40 hours.
Pattern preparation takes 2-3 hours. Leather inspection and preparation runs 1-2 hours. Pattern layout and marking requires 2-3 hours. Cutting all pieces carefully takes 2-4 hours because leather demands precision. First fitting and adjustments need another 2-3 hours. The main seam sewing is the longest phase at 8-12 hours because leather cannot be rushed. Installing the gusset and crotch panel adds 3-4 hours. The front flap sewing requires 2-3 hours. Suspender installation takes 2-3 hours. Decorative embroidery ranges from 2-6 hours depending on complexity. Final fitting and adjustments need 2-3 hours. Edge sealing and finishing requires 1-2 hours.
In reality, many first-time makers spend 60+ hours because they work slowly, are cautious, or encounter unexpected problems. Budget generously.
The Honest Verdict
Make Lederhosen if you have leatherworking experience, if you enjoy slow detailed work, if you value the cultural and creative aspect, if you have good equipment, and if you’re willing to invest 30-50 hours. Don’t make them if you’re a beginner, if you’re mainly trying to save money (you won’t), if you need them by a specific date, if you don’t have heavy-duty equipment, or if you give up easily when projects get hard.
Cost Breakdown: How Much Will This Actually Cost?
Making Lederhosen is not cheaper than buying them. If cost savings drive your decision, you should reconsider.
Breaking Down the Expenses
The largest expense is the leather. A quality hide suitable for Lederhosen costs £80-150, depending on the type and tannery. You’ll need a pattern, either pre-printed (£12-25) or adapted from an existing trouser pattern (free to £10).
Hardware and notions add up. Heavy-duty polyester thread costs £5-10, while rivets and a rivet setter run £10-15. Buttons cost £8-12 and buckles add another £10-15. Decorative embroidery floss costs £8-15, or you can outsource the work for £25-60.
Finishing supplies separate professional results from amateur projects. Edge sealant or wax costs £8-12. Leather conditioner runs £10-15. Contact cement (if needed) adds £5-8.
Tool Investment
First-time makers often underestimate tool costs. Heavy-duty scissors or a rotary cutter runs £20-50. Leather-specific needles cost £5-8 per package. An awl or stitching tool set costs £8-15. A mallet and seam roller cost £15-25. A proper cutting mat runs £10-20. Pattern weights cost £5-10. A leather marking pen costs £3-5. An edge beveler costs £10-15. A complete tool set for someone starting from scratch runs £76-148.
Total Cost Scenarios
If you already own leatherworking tools, materials cost £175-200. This includes quality leather, pattern, notions, hardware, and finishing supplies. Most first-time makers need to purchase at least some tools. A realistic first project with partial tool investment runs £270-350. Starting completely from scratch with premium materials and a full tool set puts you at £360-410.
For comparison, a professionally-made pair of quality Lederhosen costs £300-400. You receive guaranteed fit, durability, and a professional finish ready to wear immediately.
Selecting Your Leather
For detailed information on leather types, thickness, sourcing, and cost comparison, see What Are Lederhosen Made From? Leather Types Explained.
For this project, you’ll need approximately 3-4 square feet of quality hide. Most suppliers sell by the hide and will help you select appropriate thickness (1.5-2.0mm is ideal) for leatherworking.
Tools: What You Actually Need
For cutting, you need a sharp rotary cutter or leather knife (£25-40) and a self-healing cutting mat, 24″x36″ (£15-25). A metal ruler or straightedge costs £5-10. Tailor’s chalk or a leather marking pen runs £3-5.
For sewing, you need a heavy-duty sewing machine with a leather setting, or hand-stitching equipment with an awl and saddle stitch tools (£10-20). Leather needles cost £3-5 for a package. Heavy polyester thread costs £5-8.
For hardware assembly, a rivet setter kit costs £12-18. A small hammer or mallet runs £8-12. Pattern weights cost £5-10.
For finishing, a seam roller or wooden mallet costs £8-15. An edge beveler runs £8-12. Edge sealant or wax costs £8-12.
A rotary cutter makes clean cuts on leather—it’s worth the investment. A heavy-duty sewing machine is essential unless you’re hand-stitching, which takes twice as long. Leather-specific needles are non-negotiable because regular needles snag leather. Rivets and a setter are traditional to Lederhosen construction. An edge beveler makes finished edges look professional for about £10.
You can skip a fancy embroidery machine (hand embroidery works perfectly), a professional steamer, or a heat press.
Materials Checklist
Use this organized checklist: One quality leather hide (3-4 square feet minimum). Lederhosen pattern or trouser pattern for modification. Muslin or practice fabric for a test version (optional but recommended). Heavy-duty polyester thread (multiple spools). Leather thread or upholstery thread (2-3 spools). Rivets in various sizes (20-30 count). Buttons, leather or horn (4-8). Buckles (1-2). Leather scraps from the main hide for reinforcing seams. Contact cement or leather glue (1-2 tubes). Waxed thread for hand-stitching (1-2 spools).
Optionally: Embroidery floss in various colors (£8-15). Embroidery needles (1 package). Pattern for embroidery (pre-drawn on leather or printed). Edge sealant or edge wax (1 container). Leather conditioner or balm (1-2 containers). Edge dye in matching color (if needed).
Also: Work gloves for leather work. First aid kit for cuts and scrapes. Clean, well-lit workspace (minimum 4’x4′). Drop cloth to protect your work surface.
Selecting the Perfect Pattern
Pre-Made Lederhosen Patterns
Pre-made patterns work best for first-time makers. Search Etsy for “Lederhosen pattern PDF” (£8-20). Simplicity and McCall’s offer patterns (£12-18). German pattern makers sell specialized patterns (£10-25). Specialty sewing retailers can provide recommendations.
Look for patterns specifically designed for leather, not regular fabric. They should include traditional design elements like the drop-front flap, gussets, and suspender attachment points. Clear assembly instructions with step numbers matter. Markings for seam allowances and hardware placement should be explicit.
Avoid patterns with no mention of leather-specific techniques. Skip patterns designed for stretchy fabrics. Missing seam allowance information is a red flag.
Modifying Standard Trouser Patterns
If you understand pattern grading, you can adapt an existing trouser pattern. Start with a well-fitting pattern as your base. Increase seam allowances to ½” because leather doesn’t fray. Add gusset pieces (4-6″ square) at the crotch. Design a drop-front flap shaped as a rectangle. Mark suspender attachment points (2.5″ apart on waistband). Add reinforcement areas at the crotch and seat. Include decorative details for leg cuffs.
This approach works only if you’ve modified patterns before.
Getting Professional Help
Many tailors and leatherworkers will grade an existing pattern for your measurements (£15-30). Some create custom patterns from your specifications (£30-60). This costs extra but saves money if it helps you avoid mistakes.
Step-by-Step: Making Your Lederhosen
Stage 1: Preparation
Clear a large, clean, flat surface at least 3’x6′ for cutting. Lay down a protective drop cloth. Gather all tools and materials organized by category. Ensure good lighting with both overhead and task lighting.
Unfold the leather completely and inspect it for holes, scars, or thin spots. Mark these areas with chalk so you avoid them during layout. Check that thickness is consistent throughout. Identify the grain direction because leather has a nap where one direction is smoother. Allow the leather to acclimate to room temperature and humidity for 24 hours before cutting.
If using a pre-made pattern, verify it includes your measurements. If adjusting for fit, mark pattern pieces clearly. Add ¼” ease through the waist only—leather doesn’t need extra ease in the legs.
Arrange all pattern pieces on newspaper first to check grain direction consistency. Account for the nap so all pieces cut with the nap going in the same direction. Once satisfied, pin the pattern to the leather.
Stage 2: Cutting
Use tailor’s chalk on dark leather or a specialized leather marking pen on light leather. Mark all seam lines, darts, and pleat lines. Mark hardware placement like button holes and rivet positions. Use a chalk pencil for precision on curves. Don’t use regular pens because they don’t erase and mar the surface.
With a rotary cutter, use a metal ruler as your guide and press firmly but don’t force—let the cutter do the work. Make multiple light passes rather than one heavy cut. Work away from your body and keep fingers clear of the blade. With leather shears, use steady, smooth strokes and don’t rush. Sharpen blades frequently because dull blades crush leather.
After cutting, sort pieces by section and check each against the pattern. Label pieces with chalk. Work slowly—precision now prevents problems later.
Stage 3: Assembly – Main Body
Lay out front and back leg pieces and align the side seams. Pin at ¼” intervals because leather doesn’t grip like fabric. Use a heavy-duty needle (size 100/16 or 110/18) and polyester thread. Stitch at ¼” seam allowance slowly and steadily. Don’t rush leather. After sewing, flatten the seam with a mallet and seam roller. Trim excess leather from the seam to ⅛”.
Sew the inseams of both legs first. Open out the legs and insert the gusset panel at the crotch where inseams meet. Sew from the waistband down to where you want coverage to end. Reinforce with a second row of stitching ¼” from the first seam. Hand-stitch the gusset with saddle stitch for maximum strength and traditional appearance.
Cut the drop-flap according to pattern (usually 6″x8″ shaped rectangle). Align with waistband center. Stitch the top edge to the waistband with a ¼” seam. Topstitch ⅛” from the first stitching for reinforcement. Install buttons at the bottom corners (2-3 buttons typical). Mark buttonholes on the pants front piece and install eyelets or cut buttonholes. Test that the flap opens and closes properly.
Attach the waistband to the waist opening with a ¼” seam. Fold it to the back side and topstitch from the front for reinforcement. Install any darts for shaping if needed. Mark where suspender buttons will attach.
Stage 4: Suspenders and Hardware
Cut two vertical straps (1.5″ wide, 32-36″ long) and one horizontal chest strap (2.5″ wide, 8-10″ long). Soften the straps by conditioning the leather and let them sit overnight. Reinforce the ends with double-stitching or rivets to prevent tearing under tension.
Position vertical straps at the sides, approximately at the hip seam. Install large buttons at the waistband (size 20mm+) or use rivets (more traditional, more durable). Secure with multiple stitches or a rivet for strength. Join the horizontal chest strap across the sternum, stitching it securely.
Add buttonholes at ¾” intervals on vertical straps, or use leather adjustment buckles to allow wearing over shirts of different thicknesses.
Stage 5: Decorative Details
Choose 1-3 traditional motifs like edelweiss flowers, deer, oak leaves, geometric patterns, family initials, or regional symbols. Sketch the design on leather with pencil (test on scrap first). Use 6-strand embroidery floss with backstitch or satin stitch. Keep stitches even and tight. Work on chest strap, waistband, or leg cuffs.
Optional decorative touches include colored piping along leg seams or cuffs, contrasting leg cuff shapes, leather paint details, or stud and rivet accents used sparingly.
Stage 6: Final Assembly
Use edge sealant, edge wax, or clear finish applied with a brush. Allow to dry completely and sand lightly if needed. This prevents fraying and gives a professional look.
Apply quality leather balm or conditioner and work it in with a soft cloth. This allows leather to soften for break-in and protects the finish.
Check all seams for strength. Verify all buttons are secure. Test the suspender adjustment mechanism. Verify embroidery or decorative elements are intact.
Common Mistakes
Rushing the cutting phase causes problems downstream. Precision in cutting directly impacts every step. Legs that are 1-2mm different widths cause seams to twist and fit to become lopsided. Spend 4-5 hours on precise cutting. Measure twice, cut once.
Not testing the pattern first can be expensive. Using a pre-made pattern without a muslin test means discovering fit problems after spending £120 on leather. Make a test pair in muslin or cheap fabric first (£10-15 cost). Adjust the pattern before cutting leather.
Using wrong thread causes failure. Cotton thread breaks under stress at the crotch seam and the pair falls apart during first wear. Use heavy-duty polyester or upholstery thread. Expensive thread is a false economy compared to ruined leather.
Skipping reinforcement leads to tears. Crotch and seat seams tear with regular wear without extra stitching or leather patches. Reinforce stress areas with a second row of stitching or leather patches. Plan reinforcement before sewing.
Omitting the gusset removes essential comfort. The gusset provides comfort and allows movement. Without it, seams cut into the body and the pair becomes unwearable.
Miscalculating leather stretch causes fit problems. Leather stretches 1-2cm in the first month. If you size the waist too tight, it becomes loose. Add only ¼” ease through the waist and account for stretch when fitting.
Skipping edge finishing leaves raw edges vulnerable. Raw leather edges start fraying and tearing after first wear. Edge sealant (£8-10) is not optional. Apply carefully after all sewing is complete.
Troubleshooting: When Things Go Wrong
Seams puckering usually means tension is too tight, the needle is too small, the needle is dull, or the leather was stretched while sewing. Loosen the tension, use size 110/18 needle for thick leather, replace the needle, and don’t pull the leather while sewing.
Thread breaking indicates tension too tight, needle too small, or thread too thin. Loosen the tension, use heavy-duty polyester thread, and reinforce stress areas with extra stitching. For critical areas, use hand-stitched saddle stitch which is stronger.
Leather tearing at stitches happens from too many needle punctures in the same area or leather too thin for the project. Stop immediately and repair with a leather patch glued and stitched behind the tear.
Buttons or rivets not holding usually means installation error. For buttons, use a larger washer behind the button and install two stitches per hole. For rivets, use the proper rivet setter and hammer firmly until you hear a distinct click.
A waistband that’s too tight or loose means incorrect measurements or improper pattern sizing. If too tight, take apart the seam and let out by taking a smaller seam allowance. If too loose, take in by taking a larger seam allowance. Use suspenders for final adjustment.
Uneven leg length usually results from cutting inaccuracy or one leg stretching during construction. Mark correct length on both legs, trim evenly, re-install leg cuffs if applicable, and re-seal edges.
Is Making Your Own Worth It?
You’ve spent £250-350 and invested 35-50 hours of work. Alternatively, you could purchase professionally-made Lederhosen for approximately £300-400 ready to wear immediately.
Make your own if you want to learn leatherworking for future projects, if you value the cultural and personal accomplishment, if you want complete customization, or if the experience matters more than cost. Buy instead if you need them for an upcoming event, if cost matters more than the creative process, if you prefer professional quality guarantees, or if you lack the time or skill level.
Either choice is valid. This guide empowers you to make an informed decision.
FAQ: Making Your Own Lederhosen
Can a beginner make Lederhosen?
Not recommended. You need intermediate-to-advanced leatherworking or advanced sewing skills. If you’re new to leather, start with a simple belt or bag first.
What if I don’t have a heavy-duty sewing machine?
Hand-stitch using saddle stitch technique and an awl. This takes 60+ hours instead of 30-50, but it’s possible. Learn the technique on a simpler project first.
Should I make a muslin test pair?
Yes. Muslin costs £10-15 and teaches you construction. You’ll catch pattern errors before working on expensive leather.
What if I cut the leather wrong?
Small mistakes can be managed. Large cuts mean starting over. Precision matters.
How much does leather stretch?
Expect 0.5-1.5cm in waist and hips. Less in legs. Account for this when fitting.
Can I use faux leather?
For practice only. Faux doesn’t breathe, won’t patina, lacks character. Real leather is essential for the final product.
What if a seam rips during wear?
Easily repaired. Open the seam, clean it up, and re-stitch with new thread. Leather doesn’t scar like fabric.
Where do I get patterns?
Pre-made Lederhosen patterns on Etsy (£8-20) or specialty sewing retailers. Or modify an existing trouser pattern.
Do I need expensive embroidery equipment?
No. Hand embroidery works perfectly and is more traditional.
How long will homemade Lederhosen last?
Twenty to thirty years or more with proper care. Real leather improves with age.
What’s the hardest part?
Precision cutting and maintaining even tension while sewing thick leather both require patience and practice.
Resources
Learn more about the material you’ll be working with in What Are Lederhosen Made From? Leather Types Explained.
Need help with fit after making your pair? See The Complete Guide to Perfect Lederhosen Fit.
Prefer to buy professionally-made? Browse our men’s collection or women’s collection.

Anna Bauer is a seasoned Bavarian fashion expert, cultural consultant, and heritage stylist with over a decade of hands-on experience in traditional German clothing. Born in Munich, the heart of Bavaria, Anna grew up surrounded by the rich traditions of Trachten fashion. Her passion for cultural attire led her to pursue a degree in Fashion and Textile Design at the prestigious University of the Arts Berlin, where she specialized in European folkwear.
Over the past 12+ years, Anna has collaborated with renowned Trachten designers, styled outfits for Oktoberfest events across Germany, and contributed articles to top fashion and culture magazines across Europe. Her work focuses on preserving the authenticity of Lederhosen and Dirndl wear while helping modern audiences style them with confidence and flair.
As the lead content contributor for German Attire, Anna combines her academic background, professional styling experience, and deep cultural roots to provide readers with valuable insights into traditional German fashion. Her blog posts cover everything from historical origins and styling guides to care tips and festival outfit planning—making her a trusted voice for anyone looking to embrace Bavarian heritage in a stylish, modern way.